Tuesday, December 22, 2009

passion fruit chocolate.


Today I am developing my own recipe for passion fruit chocolate macarons. Since a trip to Hawaii, my family has been in love with the "deliciously sour" distinctive flavor of passion fruit. It would be perfectly accented by the creamy nuttiness of dark chocolate.

To start out, beat the eggs and sugar as usual, but instead of vanilla extract, add a teaspoon of passion fruit concentrate. I got mine from my dad's friend who has a restaurant, but I am sure you can get it online. The directions say to add sugar and water, but there is already enough sugar, and we don't want to dilute the flavor in the batter. We will also add a small bit of red and yellow food coloring.


Then add almond flour and powdered sugar as usual. The adorable measuring cups are courtesy of my sister. Also, we got a new sifter! Mix the ingredients and do the macaronnage. Then pipe the batter onto baking sheets line with parchment or silpats. The batter was a little runny, but breaking them apart should not be a problem. With a small strainer, dust cocoa powder on the cookies before they dry.


As always, heat the oven to 375 and bake the macarons for 15 minutes once they have developed a crust. They look pretty fabulous, if I do say so myself. I tried to make a chocolate passion fruit ganache, but it was difficult and frustrating. I will work on the recipe before posting it here.

xoxo,
allie

Tuesday, December 8, 2009

crazyholidaypartytime.


So today I am making macarons for a french club party on thursday. It is a good idea to make them in advance to let the flavors meld and everything softens up a bit. Then this weekend I am making macarons for my friends as gifts. Lots and lots of macarons making, but plenty of opportunity for experimenting! My main issue with the basic batter recipe is that they sort of collapse and are hollow and unattractive on the tops. They still taste great, but we are on a quest for the perfect macaron. So I am going to try the recipe for chocolate macs, only without the chocolate. They seem to turn out better. Alors, here it goes!

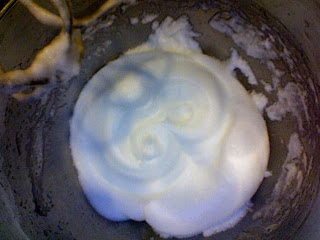
First, of course, whip the egg whites. After watching videos of french people do this on youtube, I learned something potentially very important. The eggs should be a stiff foamy mass, then, while mixing in the other ingredients, you sort of smoosh the air out of them. They call it macaronage. Also, before adding dry ingredients, I added 1/4 tsp. each of chocolate extract and vanilla extract and whipped them together. They will be sort of white chocolate-y. I have a ton of leftover white chocolate glaze from a while ago that will be perfect.
Here are the eggs before,

And here is the batter just mixed...

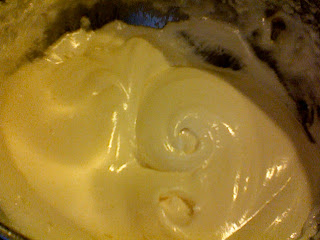
And with the macaronage.
Note how smooth it is and how it "flows like lava".

Here is the tray of piped macarons while they set and prepare for baking. I am quite proud that they are pretty much even and only two of them ran together! Hooray for practicemakesperfect! Another issue I have had previously is a weird shaped crust. They look sort of like plastic wrap or something. There is a good example in the last post. To try to avoid that, this time I put them in the oven as soon as they all had any sort of film on top. They were shiny and round. Let's see how they turned out.

They started to brown on top, so I turned the tray. I think in the end, they all turned out golden brown. They look like marshmallows toasting. Yum! I put them too close and more of them ran stuck together as they baked. Once they come out I can easily pull them apart. The recipe says to cook for 15-18 minutes, which is the longest time I have ever read. I am stopping mine at about 13 minutes. Seriously, every minute counts. I used that glaze again and, thinking I could use it like regular ganache, piled it on. it quickly melted and dripped all over the place. I will use that one as my personal taste test. This recipe seems to be perfect. I am near tears of joy.

Oh mygosh so good! Go make these right now.
Everyone needs to enjoy this magic.

xoxo,
allie

Sunday, December 6, 2009

la suprema


Today, my dad and I stopped into La Suprema, our local giant mexican bakery. They have pretty much everything you can imagine. Cakes, chocolates, crazy flans... the list goes on and on. The first time I went there, I piled my basket with almond croissants, palmiers, and-- wait! Those are classic french pastries! I walked toward the checkout counter and saw before me...... macarons! It turns out that this place has a ton of french baked goods with their names in spanish. Neato! I resisted the macarons that first time, but today, we walked straight towards the plate of macs, who sat like jewels on the platter. We got chocolate, pistachio, caramel, and strawberry. We brought them home to eat so I could take pictures of them for you. As you can see, they were smooth with eggshell-like outsides. They had beautiful feet.

My parents watched me as I took a bite of the pistachio one. CRUNCH. Wow, I was not expecting that. It was like, way crunchy. Perhaps stale? The filling was nowhere to be found. We passed its remains around the table and each let out a sigh of disappointment. Maybe the strawberry would be better. CRUNCH. Yeah, um, no. Less flavor. Come to think of it, that may have been raspberry. I couldn't tell. The caramel one's only virtue was the filling. It was dulce de leche. The nuttiness of condensed milk is distinctive and delicious. The chocolate one definitely had the most flavor. The cross-section here shows the texture. Dense. Personally, I prefer them a little.. hollower? The filling seemed like straight-up melted chocolate which had formed into a solid bar of chocolate in the middle of my solid cookie.


All of that ranting aside, La Suprema is a great bakery. I highly recommend everything there except the macarons. The tres leches is to die for. They have something called flan impossible: a layer of flan, a layer of chocolate cake. But what can I say? It is a mexican bakery.

xoxo,
allie

Wednesday, November 25, 2009

thanksgiving: part 2


Chocolate time! Making these at 10:30 with my mommy. Got to get everything done before the big day! We're using the tried and true David Lebovitz recipe. Everything went pretty smoothly, disregarding the powdered sugar which coats my eyelashes.

The most exciting part of this is we finally get to make real ganache! The perfect ratio is 9 ounces of chocolate to 1 cup of cream, but I am cutting the recipe in half. Chop the chocolate finely if you are using a block of chocolate, but chocolate chips are fine. But please-- dark chocolate. Simmer the cream, then pour it over the chopped chocolate. Let the cream melt the chocolate, then blend the mixture. If you want, add a teaspoon of dark rum or flavored liqueur. I used amaretto. the ganache should be smooth and shiny and ridiculously yummy.

Depending on your preference, there are two ways to apply the ganache to the macarons. If you are a fan of piping, pour the ganache into a piping bag and squeeze it onto every other mac. I was too tired for that, so I put the ganache in the refrigerator over night so that it set up. Then spread it on. And the beauties....

Happy Thanksgiving!

xoxo,
allie

Tuesday, November 24, 2009

thank you very much.


It's almost Thanksgiving and to alleviate the stress of baking with guests here, we are getting a head start. It has been requested that I make two flavors because a. everyone loves them and b. they are gluten free! My grandma has celiac disease (a.k.a she can't eat gluten) so she often misses out on desserts. Macarons are perfect! I will be making chocolate (everyone's favorite) and pistachio (new and exciting).

I have been aging 5 egg whites for almost a day. Each recipe really only requires 2 eggs, but with my egg cracking blunders yesterday, measuring out half will be just fine.

I am going to start with the pistachio macs. The cookie is still the same, unless you can find pistachio extract (which you can add 1/2 tsp. of to the batter). The filling, however, is going to be way different. It came from Martha Stewart's macaroon recipe, actually. But more on that later.

I ground my own almonds into flour which seemed like a great idea, but it was a little too moist, making a doughy mass. I sifted the sugar and almonds together to kind of absorb the liquid. It took literally half an hour to sift, but the results are lovely.

Then I found that 5 eggs makes 2/3 cup of egg whites. What is half of 2/3? How did I get into magnet? Wow -- stupid moment. 1/3! I whipped the eggs, added granulated sugar, and whipped some more. Then I added the dry ingredients and green food coloring. It looks greener in the picture -- it's actually perfect pistachio green. Macaron batter is supposed to "flow like magma" as many chefs have put it. This is pretty much the first time that has happened for me. The good part is that they flattened out and don't have marks from piping. The bad part is that they ran into each other, but I figure I can run a toothpick between them while they have a filmy crust and take away the batter. Then pipe and let them sit for an hour while they develop a crust and the oven preheats to 325.
Ok, well, I baked them for 10 minutes and they sort of... imploded. They stuck to the parchment and were... icky. I am making another batch without looking at the recipe (I've memorized it) and without sifting. Too time consuming. My grandparents should be here soon! The batter was significantly thicker, making piping pretty frustrating. But, as I write this, I am staring at beautiful puffy macs. Victory!
Now it's time for the filling. Martha's recipe seems to be giant, and with Thanksgiving, I would do anything to have zero leftovers. I'm cutting her recipe in half even if it does mean using half an egg... So I followed the recipe and it turned out pretty well. There is an entire stick of butter in it an you can definitely tell, but butter is yummy!

My sister iced them. Here is a pic of the beautiful products.

Now on to the next batch.

xoxo,
allie

Wednesday, November 11, 2009

comfort food.


School is getting harder, the weather is getting colder, and I am craving some comfort food. Warm, sweet, and carb-y foods make me think of sitting by the fire without going through the trouble of lighting one. Recently, I have been making bento lunches, japanese lunchboxes usually loaded with small "side dishes" and a rice based somethingorother. I make rice in a rice cooker, not on the stove, and I always end up making too much - even for a whole week. Japanese sticky rice is the perfect base for a simple, comforting desert.

The obvious way to go is a rice pudding, right? I make something even easier. Warm up some rice with a pat of butter. Sprinkle with any kind of sugar you like. I recommend brown sugar, or if you can get your hands on maple sugar, that would be even better. In the picture, I used maple flakes, which are large, crunchy sugar flakes, best compared to crushed up maple sugar candy. You know the kind that is molded into shapes and melts in your mouth? It melts into the rice, spreading the flavor throughout. To make it super special, you can use coconut rice - rice made with coconut milk instead of all or a portion of the water. It is creamy and more suited for sweets or as a good contrast for spicy foods.

If the idea of sweet rice freaks you out, think of it as the same concept as hot cereals with sugar. To me, rice has become a comforting, homey food which a good portion of my diet is based on. My life is like that song.
I'm turning japanese.

xoxo,
allie

Tuesday, October 27, 2009

marlena's macarons!

Marlena asked for some salted caramel macs. I must say, these are one of my favorite flavors to eat. The saltiness only comes from a sprinkling of fleur de sel (fancy french sea salt) before baking. If you want to be boring, leave that out, but it has a sort of chocolate-covered-pretzelyness. Yum. This time I am using the same basic batter recipe and adding red, yellow, and blue food coloring. I prefer gel food coloring so it doesn't thin out the batter. Add them in different amounts to suit your taste. I thought caramel cookies should be an orangey brown. They turned out more orange than I would like, but if you add too much food coloring, they taste like food coloring.
By now, you all pretty much know how it goes, but here are some pictures to document the process.


This last picture is in the oven. I know you can barely see them, but I needed to capture their beauty. I am in love. These would not be salted caramel macarons without caramel filling! I have a few recipes for it, but I am lazy and I have homework. So I am using caramel ice cream topping. It is the same sauce I use for lattes. Spread it on and let them sit for a day to meld the flavors.
I made a few different sizes of these. Most are average size, with a few adorable minis and one larger than average. This is fun to do and eat! Some people make them in special shapes or large sizes.
Be creative.

xoxo,
allie

P.S. You should make these. Macarons rock.

P.P.S. These travel well. Sarah said they were only a little bit smooshed.

Wednesday, October 21, 2009

many more macarons.


Tired of schoolwork and bored of making chocolate macarons (actually, you can never be bored of macarons), I asked some of my lovely friends from camp if they wanted me to make them some. Their enthusiasm was quite frightening, actually, but I was glad to seek out new recipes. On my quest, I learned that you should age the eggs separated. It makes sense. So I separated them and left the whites out for almost a day. Trust me on this. Every french pastry chef ages them for at least a day. And don't worry about the germs and whatnot. Egg whites have antibacterial properties. Just be sure to cover them with plastic wrap to keep any outside stuff from getting in your macs. Because that would be yucky. So today I am going to make...
Sarah's white chocolate macarons!

I am making a basic batter recipe from the traveler's lunchbox blog. We need preheat he oven to 325 degrees, then sift together 1 1/4 cups powdered sugar and 1 cup almond flour. Now, beat the eggs with a pinch of salt and gradually add 1/4 cup of granulated sugar. Add 1/2 tsp. any flavor extract. I am using a 1/4 tsp. each of vanilla and chocolate extract. Aging the eggs made them whip up a lot faster. Be careful not to overbeat. Fold in the dry ingredients and pipe the batter onto parchment paper-lined baking sheets. Let them set and form a skin for about an hour, then bake them for about 10 minutes. Once you take them out, let them cool completely and add your filling.


I am making a white chocolate glaze for these and to mix with lemon curd for lemon macarons. My recipe does make a lot of glaze. Basically, heat 1/2 cup soymilk until it simmers, then pour it over 12 ounces of chopped white chocolate. Let the heat start to melt the chocolate, then stir it until they are smooth and combined. Let it cool in the refrigerator until it becomes slightly thicker. You might pour this over a cake or some ice cream or something. Or eat it with a spoon.

This was my first time making macarons without chocolate. I would say that overall, they were a success. The only issue was that they were sort of hollow. I have read that this comes from overbeating the eggs or undercooking the macarons. Also, the feet seem to form in odd shapes, as if the shells float around on an ocean of batter. I am liking the whiteness of these though; they remind me of popcorn.
Glazed, the cookies had the perfect balance of crunchy and gooey (in a really good way). The glaze acted almost like a glue. Together, the macarons are very sweet, but would be nice with a cup of coffee. I will send them tomorrow and post about how they held up soon.


Sarah, you are so lucky.

xoxo,
allie

Monday, October 19, 2009

more hot chocolate. sort of.


Have you ever had those Betty Crocker warm thingies where you make a brownie in the microwave? You eat them warm and drizzle them with something yummy, and let me tell you, they are good. It is getting cold here so I want one of those. A while ago I saw a recipe for hot chocolate cake on wikihow. I think we should make it.

This seems like an awesome recipe because it uses up the hot chocolate powder I have sitting in the pantry. Also, it is single serve, and you make it in a mug in the microwave. What could be easier?

So the recipe says we need 9 tbsp. hot chocolate powder and 4 tbsp. flour. My awesome homemade mug is apparently too small, so I used 5 heaping tbsp. of hot chocolate and 2.5ish tbsp. flour. Next, crack an egg into the mug and mix it up. You might be able to see in the picture that it is really thick and difficult to stir until you add the other liquids. My mixing fork is stuck in there.
Next, add a little less than 3 tbsp. each of oil and water (the recipe says 3 but I am doing everything less). Maybe you could add 1.5 tbsp oil and add water until you get batter thickness. Ok so that was the plan, but I added too much water so I had to add more chocolate. It's like putting sawdust on oil spills.

Once the batter is mixed, it should have a smooth, runny texture. In my opinion, it seems too oily. Or maybe it will turn out awesome. Pop it in the microwave for about 3 minutes. For me, the batter kinda inflated after a minute, but shrunk back for the picture.


The picture below shows the crumb of the cake. Crumb is a cooking word that refers to the density, flakiness, and structure of the cake's interior. As you can see, it is dense. Really dense. Not fudgy or brownie-like, but eggy, almost. My hot chocolate mix was not sweet enough on its own to be a good cake mix, either. As I write and let it cool, the cake becomes more mattress-like and not very good at all.

I have created chocolate tempurpedic.

xoxo,
allie

Friday, October 9, 2009

some people pay 4 dollars for one...


The perfect latte. Not exactly a dessert, but still worthy of a special post. On days like today when I find myself faced with a month's worth of research and powerpoints to do in 12 hours, I might head to Starbucks or Panera, buy a latte, and take advantage of the free wifi. But to save money and avoid the "Oh crap I forgot my (insert important learning device here)!", I am going to make a caramel latte of my own.

The only unusual item here is a french press. Usually for brewing coffee, these contraptions consist of a carafe section and a complex top thingy. The part of the top that sits in the coffee is made of wire mesh to let the brewed drink go through the top while the grinds are stuck in the bottom. Our french press was given to my dad by a drug rep. Though they make pretty good allergy medicine, their coffee makers are a bit faulty. I like to reducereuserecycle, so I decided to use it as a frother. As I said in the hot chocolate post, froth rocks. I am sort of obsessed with it. A legit Mexican hot chocolate frother is on my Chanukah list if you want to get me one :) . In any case, this will work for now.


If you have a good french press, use that to make your coffee. I hear they produce some great stuff. I am going to use an average electric coffee maker.

Make a cup of coffee. Leave about a sixth of your cup for milk. You may want to measure out the milk first so you can see it in relation to your cup.

Pour your milk into a microwave safe cup with about a teaspoon of caramel sauce. Add more or less to your taste. Heat them up for thirty seconds. Traditionally, this would be done on a stove or in a fancy coffee maker, but I'm lazy.

Next, put the milk and caramel into the french press. Use little pumps to froth the mixture to your liking. On the top of the frother piece, you should have a small amount of very whipped "cream". Save that for the end.

After you have poured in all of the milk, mix the coffee part of the drink to see if you need to add any caramel. Drizzle some caramel on top, and you have a perfect caramel latte.
Take that Starbucks.

xoxo,
allie

Sunday, October 4, 2009

if at first you don't succeed...


I am trying again. and again. But this time I am almost positive nothing should go wrong. I took out my eggs a few hours ago and have pre-heated my oven to 375.
Here we go...
Yesterday while I was sifting with my "nifty sifty", I noticed some of the wires were breaking and would end up in my food.

So today I am using a wire colander instead and pushing the ingredients through with a large spoon.


This made a really even and fluffy mix, unlike yesterday. Maybe my sifty wasn't so nifty?


These were significantly less runny, so I felt better about letting them rest for a while, as suggested. You can do homework (what I did) or dance around your kitchen (what I wish I did) for about an hour to pass the time. As they sit, they become drier and form a sort of shell. I think this will allow for better feet than last time.
This picture is before they sat out - they should not be so shiny when you bake them.

Then bake them! The top rack developed bigger feet must faster than the bottom rack. I ended up switching their positions after 5 minutes.
I tried to take a picture of them as they baked, but the screen was reflecting in my oven door. My best shot...

Are these not the most beautiful things you have seen?

I took a picture to compare this time to last time - completely different cookies! You can't tell from the picture, but the big, flat, cracked ones have no feet and are chewy instead of crispy. Correlation? Maybe...

The only bad part about these is that the rack that was moved to the bottom ended up staying there longer than the one that started there. The bottoms burned. I think the key is to keep both racks centered in the oven. The filling masks the flavor and turns it into a pleasant nuttiness! Perfect.

When they were iced they looked like this:

Bake them a day in advance so the flavors of the filling can meld with the cookie.
Success!

xoxo,
allie

P.S. If you want me to send you a link for this winning recipe, let me know!

Saturday, October 3, 2009

macarons part deux


I am going to try to make macarons again. This time, I have prepared by grinding the too-big almond flour little smaller. Actually my wonderful mother did that for me. But anyway, I am going to use a recipe that has worked for me in the past so that I can show you something good. I got it from David Lebovitz's blog. He seems to have already gone through this process and gotten a good recipe. His turned out like this...

macarons2parisfinished.jpg

Beautiful, non?

So before I even started cooking, I already made the mistake of not aging my eggs. I am going to try warming a towel and wrapping my eggs like a blanket. I am using the microwave so it is important to wet the towel or else we might have a fire.

This recipe makes half as many cookies as the recipe from my last post, so it uses 2 eggs instead of 4. Another difference is that this mixes all of the dry ingredients together at the beginning instead of mixing the sugar with the eggs before the rest of the dry.
I'll show you "Good Eats" style:

Dry Team

Wet Team (eggs)


I found mixing this recipe a lot harder but the batter looks better than last time. It is thick and brownie-batter-ish. I put it in a pastry bag with a hole in the bottom standing in a cup. This is useful for stability if you bake alone and no one can hole the bag for you (I am too much of a control freak to bake with others). Also, when you lift the bag squeeze a little bit into the bottom of the cup to get used to the unnaturalness of piping. I find that piping from one place instead of in a spiral makes a more uniform and pretty macaron.


As you can see, these were really runny. I was actually really surprised! I separated them by running my spatula between them carefully. Unforunately, they ran back together in the oven. I am going to cut them apart while they are warm and soft. They did develop feet within minutes, however, which is awesome, but the tops cracked. I don't really mind because no one I am serving these to (besides my French teacher) knows that macarons should be flawless and smooth! This recipe said to cook them for 15-18 minutes, but I burn them every time, so I am cooking them for the minimum. Every minute is important!

Cool them completely before trying to remove them from the foil. Ok. After my peeling experience here, I am going to tell you NEVER USE FOIL. Use parchment paper! Some of my macarons looked good and I ended up poking holes in them and all sorts of nonsense. It was painful. Just avoid foil.
The picture below is just proof that they were, at one time, perfect-ish. But then I had to eat them off of the foil with a spoon.


I have to make another batch tomorrow because I signed up to bring these for a Madame Bovary watching party in French class. So there will be a new post tomorrow.
Lucky you.

xoxo,
allie