Tuesday, October 27, 2009

marlena's macarons!

Marlena asked for some salted caramel macs. I must say, these are one of my favorite flavors to eat. The saltiness only comes from a sprinkling of fleur de sel (fancy french sea salt) before baking. If you want to be boring, leave that out, but it has a sort of chocolate-covered-pretzelyness. Yum. This time I am using the same basic batter recipe and adding red, yellow, and blue food coloring. I prefer gel food coloring so it doesn't thin out the batter. Add them in different amounts to suit your taste. I thought caramel cookies should be an orangey brown. They turned out more orange than I would like, but if you add too much food coloring, they taste like food coloring.
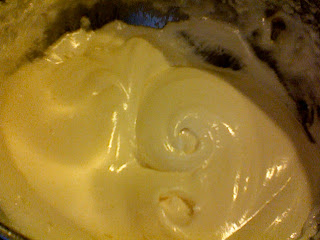
By now, you all pretty much know how it goes, but here are some pictures to document the process.


This last picture is in the oven. I know you can barely see them, but I needed to capture their beauty. I am in love. These would not be salted caramel macarons without caramel filling! I have a few recipes for it, but I am lazy and I have homework. So I am using caramel ice cream topping. It is the same sauce I use for lattes. Spread it on and let them sit for a day to meld the flavors.
I made a few different sizes of these. Most are average size, with a few adorable minis and one larger than average. This is fun to do and eat! Some people make them in special shapes or large sizes.
Be creative.

xoxo,
allie

P.S. You should make these. Macarons rock.

P.P.S. These travel well. Sarah said they were only a little bit smooshed.

Wednesday, October 21, 2009

many more macarons.


Tired of schoolwork and bored of making chocolate macarons (actually, you can never be bored of macarons), I asked some of my lovely friends from camp if they wanted me to make them some. Their enthusiasm was quite frightening, actually, but I was glad to seek out new recipes. On my quest, I learned that you should age the eggs separated. It makes sense. So I separated them and left the whites out for almost a day. Trust me on this. Every french pastry chef ages them for at least a day. And don't worry about the germs and whatnot. Egg whites have antibacterial properties. Just be sure to cover them with plastic wrap to keep any outside stuff from getting in your macs. Because that would be yucky. So today I am going to make...
Sarah's white chocolate macarons!

I am making a basic batter recipe from the traveler's lunchbox blog. We need preheat he oven to 325 degrees, then sift together 1 1/4 cups powdered sugar and 1 cup almond flour. Now, beat the eggs with a pinch of salt and gradually add 1/4 cup of granulated sugar. Add 1/2 tsp. any flavor extract. I am using a 1/4 tsp. each of vanilla and chocolate extract. Aging the eggs made them whip up a lot faster. Be careful not to overbeat. Fold in the dry ingredients and pipe the batter onto parchment paper-lined baking sheets. Let them set and form a skin for about an hour, then bake them for about 10 minutes. Once you take them out, let them cool completely and add your filling.


I am making a white chocolate glaze for these and to mix with lemon curd for lemon macarons. My recipe does make a lot of glaze. Basically, heat 1/2 cup soymilk until it simmers, then pour it over 12 ounces of chopped white chocolate. Let the heat start to melt the chocolate, then stir it until they are smooth and combined. Let it cool in the refrigerator until it becomes slightly thicker. You might pour this over a cake or some ice cream or something. Or eat it with a spoon.

This was my first time making macarons without chocolate. I would say that overall, they were a success. The only issue was that they were sort of hollow. I have read that this comes from overbeating the eggs or undercooking the macarons. Also, the feet seem to form in odd shapes, as if the shells float around on an ocean of batter. I am liking the whiteness of these though; they remind me of popcorn.
Glazed, the cookies had the perfect balance of crunchy and gooey (in a really good way). The glaze acted almost like a glue. Together, the macarons are very sweet, but would be nice with a cup of coffee. I will send them tomorrow and post about how they held up soon.


Sarah, you are so lucky.

xoxo,
allie

Monday, October 19, 2009

more hot chocolate. sort of.


Have you ever had those Betty Crocker warm thingies where you make a brownie in the microwave? You eat them warm and drizzle them with something yummy, and let me tell you, they are good. It is getting cold here so I want one of those. A while ago I saw a recipe for hot chocolate cake on wikihow. I think we should make it.

This seems like an awesome recipe because it uses up the hot chocolate powder I have sitting in the pantry. Also, it is single serve, and you make it in a mug in the microwave. What could be easier?

So the recipe says we need 9 tbsp. hot chocolate powder and 4 tbsp. flour. My awesome homemade mug is apparently too small, so I used 5 heaping tbsp. of hot chocolate and 2.5ish tbsp. flour. Next, crack an egg into the mug and mix it up. You might be able to see in the picture that it is really thick and difficult to stir until you add the other liquids. My mixing fork is stuck in there.
Next, add a little less than 3 tbsp. each of oil and water (the recipe says 3 but I am doing everything less). Maybe you could add 1.5 tbsp oil and add water until you get batter thickness. Ok so that was the plan, but I added too much water so I had to add more chocolate. It's like putting sawdust on oil spills.

Once the batter is mixed, it should have a smooth, runny texture. In my opinion, it seems too oily. Or maybe it will turn out awesome. Pop it in the microwave for about 3 minutes. For me, the batter kinda inflated after a minute, but shrunk back for the picture.


The picture below shows the crumb of the cake. Crumb is a cooking word that refers to the density, flakiness, and structure of the cake's interior. As you can see, it is dense. Really dense. Not fudgy or brownie-like, but eggy, almost. My hot chocolate mix was not sweet enough on its own to be a good cake mix, either. As I write and let it cool, the cake becomes more mattress-like and not very good at all.

I have created chocolate tempurpedic.

xoxo,
allie

Friday, October 9, 2009

some people pay 4 dollars for one...


The perfect latte. Not exactly a dessert, but still worthy of a special post. On days like today when I find myself faced with a month's worth of research and powerpoints to do in 12 hours, I might head to Starbucks or Panera, buy a latte, and take advantage of the free wifi. But to save money and avoid the "Oh crap I forgot my (insert important learning device here)!", I am going to make a caramel latte of my own.

The only unusual item here is a french press. Usually for brewing coffee, these contraptions consist of a carafe section and a complex top thingy. The part of the top that sits in the coffee is made of wire mesh to let the brewed drink go through the top while the grinds are stuck in the bottom. Our french press was given to my dad by a drug rep. Though they make pretty good allergy medicine, their coffee makers are a bit faulty. I like to reducereuserecycle, so I decided to use it as a frother. As I said in the hot chocolate post, froth rocks. I am sort of obsessed with it. A legit Mexican hot chocolate frother is on my Chanukah list if you want to get me one :) . In any case, this will work for now.


If you have a good french press, use that to make your coffee. I hear they produce some great stuff. I am going to use an average electric coffee maker.

Make a cup of coffee. Leave about a sixth of your cup for milk. You may want to measure out the milk first so you can see it in relation to your cup.

Pour your milk into a microwave safe cup with about a teaspoon of caramel sauce. Add more or less to your taste. Heat them up for thirty seconds. Traditionally, this would be done on a stove or in a fancy coffee maker, but I'm lazy.

Next, put the milk and caramel into the french press. Use little pumps to froth the mixture to your liking. On the top of the frother piece, you should have a small amount of very whipped "cream". Save that for the end.

After you have poured in all of the milk, mix the coffee part of the drink to see if you need to add any caramel. Drizzle some caramel on top, and you have a perfect caramel latte.
Take that Starbucks.

xoxo,
allie

Sunday, October 4, 2009

if at first you don't succeed...


I am trying again. and again. But this time I am almost positive nothing should go wrong. I took out my eggs a few hours ago and have pre-heated my oven to 375.
Here we go...
Yesterday while I was sifting with my "nifty sifty", I noticed some of the wires were breaking and would end up in my food.

So today I am using a wire colander instead and pushing the ingredients through with a large spoon.


This made a really even and fluffy mix, unlike yesterday. Maybe my sifty wasn't so nifty?


These were significantly less runny, so I felt better about letting them rest for a while, as suggested. You can do homework (what I did) or dance around your kitchen (what I wish I did) for about an hour to pass the time. As they sit, they become drier and form a sort of shell. I think this will allow for better feet than last time.
This picture is before they sat out - they should not be so shiny when you bake them.

Then bake them! The top rack developed bigger feet must faster than the bottom rack. I ended up switching their positions after 5 minutes.
I tried to take a picture of them as they baked, but the screen was reflecting in my oven door. My best shot...

Are these not the most beautiful things you have seen?

I took a picture to compare this time to last time - completely different cookies! You can't tell from the picture, but the big, flat, cracked ones have no feet and are chewy instead of crispy. Correlation? Maybe...

The only bad part about these is that the rack that was moved to the bottom ended up staying there longer than the one that started there. The bottoms burned. I think the key is to keep both racks centered in the oven. The filling masks the flavor and turns it into a pleasant nuttiness! Perfect.

When they were iced they looked like this:

Bake them a day in advance so the flavors of the filling can meld with the cookie.
Success!

xoxo,
allie

P.S. If you want me to send you a link for this winning recipe, let me know!

Saturday, October 3, 2009

macarons part deux


I am going to try to make macarons again. This time, I have prepared by grinding the too-big almond flour little smaller. Actually my wonderful mother did that for me. But anyway, I am going to use a recipe that has worked for me in the past so that I can show you something good. I got it from David Lebovitz's blog. He seems to have already gone through this process and gotten a good recipe. His turned out like this...

macarons2parisfinished.jpg

Beautiful, non?

So before I even started cooking, I already made the mistake of not aging my eggs. I am going to try warming a towel and wrapping my eggs like a blanket. I am using the microwave so it is important to wet the towel or else we might have a fire.

This recipe makes half as many cookies as the recipe from my last post, so it uses 2 eggs instead of 4. Another difference is that this mixes all of the dry ingredients together at the beginning instead of mixing the sugar with the eggs before the rest of the dry.
I'll show you "Good Eats" style:

Dry Team

Wet Team (eggs)


I found mixing this recipe a lot harder but the batter looks better than last time. It is thick and brownie-batter-ish. I put it in a pastry bag with a hole in the bottom standing in a cup. This is useful for stability if you bake alone and no one can hole the bag for you (I am too much of a control freak to bake with others). Also, when you lift the bag squeeze a little bit into the bottom of the cup to get used to the unnaturalness of piping. I find that piping from one place instead of in a spiral makes a more uniform and pretty macaron.


As you can see, these were really runny. I was actually really surprised! I separated them by running my spatula between them carefully. Unforunately, they ran back together in the oven. I am going to cut them apart while they are warm and soft. They did develop feet within minutes, however, which is awesome, but the tops cracked. I don't really mind because no one I am serving these to (besides my French teacher) knows that macarons should be flawless and smooth! This recipe said to cook them for 15-18 minutes, but I burn them every time, so I am cooking them for the minimum. Every minute is important!

Cool them completely before trying to remove them from the foil. Ok. After my peeling experience here, I am going to tell you NEVER USE FOIL. Use parchment paper! Some of my macarons looked good and I ended up poking holes in them and all sorts of nonsense. It was painful. Just avoid foil.
The picture below is just proof that they were, at one time, perfect-ish. But then I had to eat them off of the foil with a spoon.


I have to make another batch tomorrow because I signed up to bring these for a Madame Bovary watching party in French class. So there will be a new post tomorrow.
Lucky you.

xoxo,
allie


Thursday, October 1, 2009

epic fail.

So, last post I did not show you pictures of my macarons. That is because they were what one might call an epic fail. I would just like to clarify a few things about macarons and my skills.
I am in love with macarons, but I am not the best at making them. They are considered one of the most difficult pastries in the world. If you would like to attempt making them, I would wholeheartedly encourage you to find a recipe. I would also send you the All About Chocolate recipe - just ask.

Some perfect macarons look like...

macarons.jpg

As you can see, they come in vibrant colors, which means there are infinite flavor combinations to choose from. Some of these have things sprinkled on the top like nuts, cocoa, or chocolate shavings. I have not experimented with colors or flavors besides chocolate, so more on that later. These are also smooth(ish) on the tops. If you let them set for a while before baking, or bang the tray carefully on a table, they should even out for a nice texture and look. The bubbly looking bit at the bottom of each half is called a foot. If your macs develop feet in the oven, they will most likely have a light and airy center. Here is a good diagram to explain.

macarons-perfect.jpg

Pierre Hermé: the god of macarons and french pastry. Everything he makes, no matter how crazy, turns out pretty fantastic (or so I hear). On my next trip to Paris, for sure going to one of his shops. The thing about macarons, however, is that they are expensive. At the famous Ladurée tea room, I got 4 delicious mini macarons for FOUR EUROS. That's like 6 dollars. A little ridiculous. So that is why I have set out to make yummy, high quality macarons in my house, not in France. I am trying to buy some french macaron books, but shipping is a bit insane and the amazon site is in French. I actually feel really smart when I read it. For some reason, Hermé's book is like.. really expensive. I did find a pack of 3 books that are less than 20 euros combined.
I don't know about you, but I think macarons are adorable (even though everyone thinks they are hamburgers), so I am going to show you some gorgeous photos of different kinds of macarons. Enjoy!

imgres.jpg

macaron_plenitude_ph_fw_05_1.JPG.jpg

macaron.jpg

Three+Trees.jpg

macaron_aux_fraises_et_aux_kumquats_confits_et_sa_creme_parfumee_aux_epices.jpg

I just had to say something about this one. I have never seen anything like it.
Macaron with strawberries, kumquat jam and a kumquat on top, with lemon cream.
Oh mon Dieu.

xoxo,
allie